Colleen Schnettler
March 20, 2024
How to connect your Fly.io postgres db to HelloQuery
Fly Postgres databases are on an internal private network and need to be configured to accept connections from HelloQuery. This step by step guide will make the process (relatively) painless, stick with us!
Table of Contents
Connect to your Fly.io postgres database
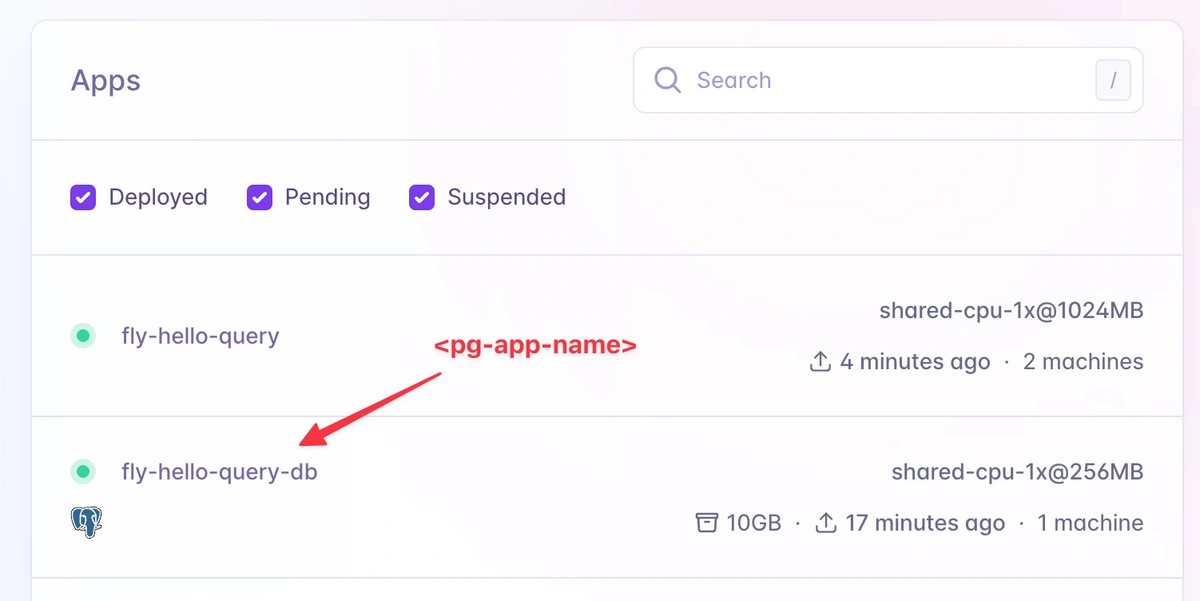
The first step in this process is to connect to your postgres instance. To do that, you'll need to log in to your fly.io dashboard and find your <pg-app-name>. For this tutorial, we'll use the data in the screenshot below so our <pg-app-name> is fly-hello-query-db.
Download the flyctl if you haven't already:
brew install flyctl
Next you'll need to connect to your database using psql and the fly CLI.
From a command terminal:
fly postgres connect -a fly-hello-query-db
You should see a postgres terminal. The next step is to connect to the correct database.
\l will show you the list of available databases.

Identify the database you want to use and connect using the \c command:
postgres=# \c fly_hello_query You are now connected to database "fly_hello_query" as user "postgres".
Create a read-only user
Now, let's create a read-only user!
From the psql terminal, enter the following (use a secure password)
CREATE USER limited_user WITH PASSWORD 'temp';
GRANT USAGE ON SCHEMA public TO limited_user;
GRANT SELECT ON ALL TABLES IN SCHEMA public TO limited_user;
ALTER DEFAULT PRIVILEGES IN SCHEMA public GRANT SELECT ON TABLES TO limited_user;
REVOKE CREATE ON SCHEMA public FROM limited_user;
List the users using the command \du . Confirm limited_user appears in the list of users.
Nicely done! You're all set and can move on to the next step!
If you'd like to confirm you did this correctly for peace of mind, you can connect with limited_user and confirm it is a read-only connection. To do this, you need to disconnect as the current user and reconnect as the limited_user.
To exit the current psql session type ctrl+D.
Connect as limited_user:
fly postgres connect -a fly-hello-query-db --user limited_user --password "temp"
\c fly_hello_query
You can type \conninfo at any time to check your user status.
Here’s a test to confirm you have read-only privileges. Note: This should not work!
CREATE TABLE test_read_only (
id SERIAL PRIMARY KEY,
data TEXT
);
Set up your dedicated IPv4
Due to the way Fly is configured, you must set up a dedicated IPv4 address. Unfortunately, you must pay $2 for a dedicated IP. We'll refund you the difference—just email us at [email protected].
From the flyctl type:
fly ips allocate-v4 —app <pg-app-name>

Update your fly.toml by running
fly config save --app fly-hello-query-db
Alternatively, you can modify it manually as described in the fly.io documentation
Next, you'll need your image fly image show --app <pg-app-name>
Deploy
Great work! Now you can deploy, and you'll be all set!
From the CLI:
fly deploy . --app <pg-app-name> --image flyio/postgres-flex:<major-version>
For example:
fly deploy . --app fly-hello-query-db --image flyio/postgres-flex:15.3
Check your permissions at any time by using psql to access your database:
psql "sslmode=require host=fly-hello-query-db.fly.dev dbname=fly_hello_query user=limited_user”
Connect to HelloQuery
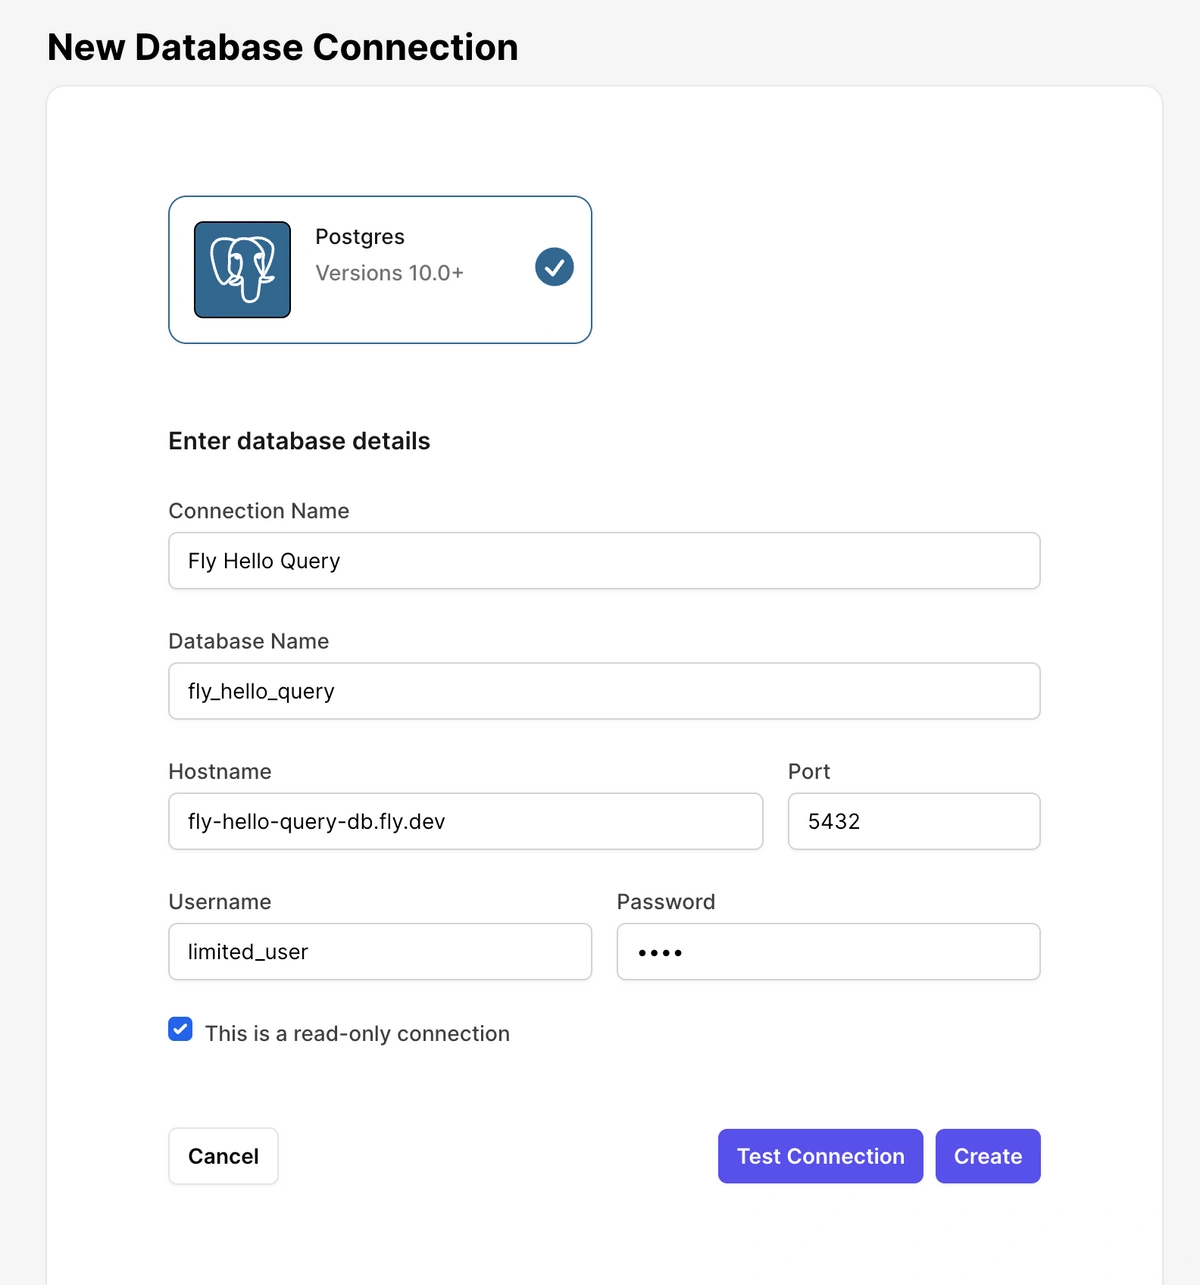
You can now connect to helloquery with the following credentials:
- Connection Name: A name to identify this database
- Database Name: Your database name
- Hostname: Your datbase hostname.fly.dev
- Username: limited_user (or whatever you set up in psql)
- Password: Your secure password
Connected!
Your fly.io database is now linked with HelloQuery. Head to the "Queries" page to start exploring your data. Here you can:
- Ask questions
- Build reports
- Dive deeper into your data insights
Ready, set, query!